Существует множество инструментов для работы с подключенным с помощью USB-кабеля или Wi-Fi смартфоном. Особо развитые инструменты позволяют перемещать файлы, устанавливать и удалять софт, просматривать контакты, делать скриншоты экрана и даже отправлять СМС, однако ни один графический инструмент не сравнится с мощью, которую может дать консоль Android. В этой статье мы поговорим об ADB (Android Debug Bridge) - стандартном инструменте для отладки и работы с консолью Android с компа.
Описанные в статье команды можно выполнять непосредственно на устройстве, скачав из маркета эмулятор терминала , но удобнее это делать, конечно же, с компа через adb.
Основы работы с ADB
Для начала работы с ADB его следует активировать на устройстве и установить утилиту adb и драйверы на комп. Первая задача выполняется с помощью включения «Отладки по USB» в пункте настроек «Для разработчиков» (если этот пункт скрыт, нажми семь раз на номер сборки в меню «О телефоне»).
Для установки ADB на комп качаем Adb Kit и распаковываем в любую папку (рекомендую использовать названия папок без русских символов). Также скачиваем и устанавливаем драйверы ADB .
Работать с adb нужно из командной строки. Нажимаем Win + R и вводим cmd, далее переходим в папку, в которой лежит adb. Для моей папки команда будет следующей:
Cd \android
Чтобы не проделывать все эти манипуляции каждый раз, можно добавить нужную папку в переменную Path. Для этого необходимо зайти в «Панель управления -> Система -> Дополнительные параметры системы -> Переменные среды», найти переменную Path и добавить в конец строки, через точку с запятой, путь до папки с adb. Теперь после запуска консоли можно сразу вводить необходимые команды.
Проверим наше подключение к телефону с помощью следующей команды (она должна вывести список подключенных устройств):
Adb devices
С ADB можно работать через Wi-Fi. Для этого нужны права root и приложение WiFi ADB . Запускаем приложение, жмем переключатель и подсоединяемся к смартфону с помощью команды connect и показанного приложением IP-адреса:
INFO
Скопировать вывод консоли после выделения мышкой, а также вставить скопированную команду или имя файла в консоль можно правой кнопкой мыши. Включается в свойствах консоли.Установка программ
ADB можно использовать для установки приложений без необходимости копировать их на смартфон. Достаточно выполнить такую команду:
Adb install d:/downloads/имя_файла.apk
В команду также можно добавить дополнительные ключи. Полезными будут -е - переустановить приложение с сохранением данных и -d - установить версию меньше текущей.
Программы можно и удалять, но для этого нужно знать название пакета (как узнать, расскажу чуть позже). На примере игры Angry Birds Seasons команда будет выглядеть так:
Adb uninstall com.rovio.angrybirdsseasons
Бэкап приложений
В Android есть встроенные функции бэкапа, которые также можно запустить с помощью командной строки. Для этого используется команда adb backup и набор опций:
Adb backup [опции] <приложения>
- -f указывает имя создаваемого файла и его расположение на компе. При отсутствии ключа будет создан файл backup.ab в текущем каталоге;
- -apk|-noapk указывает, включать ли в бэкап только данные приложения или сам.apk тоже (по умолчанию не включает);
- -obb|-noobb указывает, включать ли в бэкап расширения.obb для приложений (по умолчанию не включает);
- -shared|-noshared указывает, включать ли в бэкап содержимое приложения на SD-карте (по умолчанию не включает);
- -all указывает на необходимость бэкапа всех установленных приложений;
- -system|-nosystem указывает, включать ли в бэкап системные приложения (по умолчанию включает);
- - перечень пакетов для бэкапа.
Если мы хотим создать бэкап всех несистемных прог, включая сами.apk, в определенное место, то команда будет выглядеть так:
Adb backup -f c:\android\backup.ab -apk -all -nosystem
После ввода необходимо подтвердить начало выполнения бэкапа на самом устройстве. Для восстановления полученного бэкапа нужно выполнить соответствующую команду:
Adb restore c:\android\backup.ab

Консоль в консоли
Наряду с упомянутой консолью, которая является DOS-консолью под Windows, в Android существует и своя. Она вызывается через adb shell и представляет собой по сути стандартную Linux-консоль, но с неполным набором команд, расширить который можно, установив из маркета BusyBox. Использовать эту консоль можно двумя способами. В интерактивном режиме она запускается командой
Adb shell
В консоли появляется знак $ (далее по тексту этот знак будет означать необходимость ввода предварительной команды adb shell), и после этого можно вводить серию команд, получая после каждой отклик. Второй способ - если необходимо ввести только одну команду, можно писать ее подряд за adb shell.
В шелле работают стандартные команды для копирования, перемещения и удаления файлов: cp , mv и rm . Можно менять каталоги (cd ) и смотреть их содержимое (ls ). Кроме стандартных Linux-команд, о которых можно узнать из любого справочника, в Android есть несколько своих специализированных инструментов, но, чтобы использовать некоторые из них, придется получить на смартфоне права root, а после запуска консоли выполнять команду su:
Adb shell su
Это нужно делать, если в ответ на какую-либо команду ты видишь строку, похожую на «access denied» или «are you root?». В случае успеха знак $ сменится на #.


Создание скриншота
Выполняется одной строчкой:
Adb shell screencap /sdcard/screen.png
После этого картинку нужно выдернуть из устройства командой adb pull :
Adb pull /sdcard/screen.png
В recovery скриншот можно сделать следующей командой:
Adb pull /dev/graphics/fb0
Затем необходимо преобразовать файл fb0 в нормальное изображение с помощью FFmpeg, который нужно скачать и положить в папку с adb. Расширение необходимо ставить своего устройства:
Ffmpeg -f rawvideo -pix_fmt rgb32 -s 1080x1920 -i fb0 fb0.png
Запись видео, происходящего на экране устройства
adb shell screenrecord --size 1280x720 --bit-rate 6000000 --time-limit 20 --verbose /sdcard/video.mp4Данная команда начнет записывать видео с разрешением 1280 x 720 (если не указать, то будет использовано нативное разрешение экрана устройства), с битрейтом 6 Мбит/с, длиной 20 с (если не указать, то будет выставлено максимальное значение 180 с), с показом логов в консоли. Записанное видео будет находиться в /sdcard (файл video.mp4).
INFO
Все запущенные из консоли и в adb shell процессы, занимающие некоторое время для выполнения, можно прервать с помощью комбинации Ctrl + C. Выйти из шелла и вернуться к выполнению обычных команд adb - Ctrl + D.Управление приложениями
Для управления приложениями используются две команды: pm (package manager) - менеджер пакетов и am (activity manager) - менеджер активностей. У данных команд есть немало ключей, которые можно посмотреть на портале разработчиков . Остановимся на некоторых.
Для начала получим список установленных на устройстве приложений в виде названий пакетов, которые пригодятся позже:
Продолжение доступно только участникам
Вариант 1. Присоединись к сообществу «сайт», чтобы читать все материалы на сайте
Членство в сообществе в течение указанного срока откроет тебе доступ ко ВСЕМ материалам «Хакера», увеличит личную накопительную скидку и позволит накапливать профессиональный рейтинг Xakep Score!
Android Debug Bridge (adb) is a versatile command-line tool that lets you communicate with a device. The adb command facilitates a variety of device actions, such as installing and debugging apps, and it provides access to a Unix shell that you can use to run a variety of commands on a device. It is a client-server program that includes three components:
- A client , which sends commands. The client runs on your development machine. You can invoke a client from a command-line terminal by issuing an adb command.
- A daemon (adbd) , which runs commands on a device. The daemon runs as a background process on each device.
- A server , which manages communication between the client and the daemon. The server runs as a background process on your development machine.
adb is included in the Android SDK Platform-Tools package. You can download this package with the SDK Manager , which installs it at android_sdk /platform-tools/ . Or if you want the standalone Android SDK Platform-Tools package, you can .
For information on connecting a device for use over ADB, including how to use the Connection Assistant to troubleshoot common problems, see Run apps on a hardware device .
How adb works
When you start an adb client, the client first checks whether there is an adb server process already running. If there isn"t, it starts the server process. When the server starts, it binds to local TCP port 5037 and listens for commands sent from adb clients—all adb clients use port 5037 to communicate with the adb server.
The server then sets up connections to all running devices. It locates emulators by scanning odd-numbered ports in the range 5555 to 5585, the range used by the first 16 emulators. Where the server finds an adb daemon (adbd), it sets up a connection to that port. Note that each emulator uses a pair of sequential ports — an even-numbered port for console connections and an odd-numbered port for adb connections. For example:
Emulator 1, console: 5554
Emulator 1, adb: 5555
Emulator 2, console: 5556
Emulator 2, adb: 5557
and so on...
As shown, the emulator connected to adb on port 5555 is the same as the emulator whose console listens on port 5554.
Once the server has set up connections to all devices, you can use adb commands to access those devices. Because the server manages connections to devices and handles commands from multiple adb clients, you can control any device from any client (or from a script).
Enable adb debugging on your device
To use adb with a device connected over USB, you must enable USB debugging in the device system settings, under Developer options .
On Android 4.2 and higher, the Developer options screen is hidden by default. To make it visible, go to Settings > About phone and tap Build number seven times. Return to the previous screen to find Developer options at the bottom.
On some devices, the Developer options screen might be located or named differently.
You can now connect your device with USB. You can verify that your device is connected by executing adb devices from the android_sdk /platform-tools/ directory. If connected, you"ll see the device name listed as a "device."
Note: When you connect a device running Android 4.2.2 or higher, the system shows a dialog asking whether to accept an RSA key that allows debugging through this computer. This security mechanism protects user devices because it ensures that USB debugging and other adb commands cannot be executed unless you"re able to unlock the device and acknowledge the dialog.
For more information about connecting to a device over USB, read Run Apps on a Hardware Device .
Connect to a device over Wi-Fi
adb usually communicates with the device over USB, but you can also use adb over Wi-Fi after some initial setup over USB, as described below. If you"re developing for Wear OS, however, you should instead see the guide to debugging a Wear OS app , which has special instructions for using adb with Wi-Fi and Bluetooth.
- Connect your Android device and adb host computer to a common Wi-Fi network accessible to both. Beware that not all access points are suitable; you might need to use an access point whose firewall is configured properly to support adb.
- If you are connecting to a Wear OS device, turn off Bluetooth on the phone that"s paired with the device.
- Connect the device to the host computer with a USB cable.
- Set the target device to listen for a TCP/IP connection on port 5555. adb tcpip 5555
- Disconnect the USB cable from the target device.
- Find the IP address of the Android device. For example, on a Nexus device, you can find the IP address at Settings > About tablet (or About phone ) > Status > IP address . Or, on a Wear OS device, you can find the IP address at Settings > Wi-Fi Settings > Advanced > IP address .
- Connect to the device by its IP address. adb connect device_ip_address
- Confirm that your host computer is connected to the target device: $ adb devices List of devices attached device_ip_address:5555 device
You"re now good to go!
If the adb connection is ever lost:
- Make sure that your host is still connected to the same Wi-Fi network your Android device is.
- Reconnect by executing the adb connect step again.
- Or if that doesn"t work, reset your adb host:
adb kill-server
Then start over from the beginning.
Query for devices
Before issuing adb commands, it is helpful to know what device instances are connected to the adb server. You can generate a list of attached devices using the devices command.
Adb devices -l
In response, adb prints this status information for each device:
- Serial number: A string created by adb to uniquely identify the device by its port number. Here"s an example serial number: emulator-5554
- State: The connection state of the device can be one of the following:
- offline: The device is not connected to adb or is not responding.
- device: The device is now connected to the adb server. Note that this state does not imply that the Android system is fully booted and operational because the device connects to adb while the system is still booting. However, after boot-up, this is the normal operational state of an device.
- no device: There is no device connected.
- Description: If you include the -l option, the devices command tells you what the device is. This information is helpful when you have multiple devices connected so that you can tell them apart.
The following example shows the devices command and its output. There are three devices running. The first two lines in the list are emulators, and the third line is a hardware device that is attached to the computer.
$ adb devices List of devices attached emulator-5556 device product:sdk_google_phone_x86_64 model:Android_SDK_built_for_x86_64 device:generic_x86_64 emulator-5554 device product:sdk_google_phone_x86 model:Android_SDK_built_for_x86 device:generic_x86 0a388e93 device usb:1-1 product:razor model:Nexus_7 device:flo
Emulator not listed
The adb devices command has a corner-case command sequence that causes running emulator(s) to not show up in the adb devices output even though the emulator(s) are visible on your desktop. This happens when all of the following conditions are true:
- The adb server is not running, and
- You use the emulator command with the -port or -ports option with an odd-numbered port value between 5554 and 5584, and
- The odd-numbered port you chose is not busy so the port connection can be made at the specified port number, or if it is busy, the emulator switches to another port that meets the requirements in 2, and
- You start the adb server after you start the emulator.
One way to avoid this situation is to let the emulator choose its own ports, and don"t run more than 16 emulators at once. Another way is to always start the adb server before you use the emulator command, as explained in the following examples.
Example 1: In the following command sequence, the adb devices command starts the adb server, but the list of devices does not appear.
Stop the adb server and enter the following commands in the order shown. For the avd name, provide a valid avd name from your system. To get a list of avd names, type emulator -list-avds . The emulator command is in the android_sdk /tools directory.
$ adb kill-server $ emulator -avd Nexus_6_API_25 -port 5555 $ adb devices List of devices attached * daemon not running. starting it now on port 5037 * * daemon started successfully *
Example 2: In the following command sequence, adb devices displays the list of devices because the adb server was started first.
To see the emulator in the adb devices output, stop the adb server, and then start it again after using the emulator command and before using the adb devices command, as follows:
$ adb kill-server $ emulator -avd Nexus_6_API_25 -port 5557 $ adb start-server $ adb devices List of devices attached emulator-5557 device
For more information about emulator command-line options, see Using Command Line Parameters .
Send commands to a specific device
If multiple devices are running, you must specify the target device when you issue the adb command. To specify the target, use the devices command to get the serial number of the target. Once you have the serial number, use the -s option with the adb commands to specify the serial number. If you"re going to issue a lot of adb commands, you can set the $ANDROID_SERIAL environment variable to contain the serial number instead. If you use both -s and $ANDROID_SERIAL , -s overrides $ANDROID_SERIAL .
In the following example, the list of attached devices is obtained, and then the serial number of one of the devices is used to install the helloWorld.apk on that device.
$ adb devices List of devices attached emulator-5554 device emulator-5555 device $ adb -s emulator-5555 install helloWorld.apk
Note: If you issue a command without specifying a target device when multiple devices are available, adb generates an error.
If you have multiple devices available, but only one is an emulator, use the -e option to send commands to the emulator. Likewise, if there are multiple devices but only one hardware device attached, use the -d option to send commands to the hardware device.
Install an app
You can use adb to install an APK on an emulator or connected device with the install command:
Adb install path_to_apk
You must use the -t option with the install command when you install a test APK. For more information, see .
For more information about how to create an APK file that you can install on an emulator/device instance, see Build and Run Your App .
Note that, if you are using Android Studio, you do not need to use adb directly to install your app on the emulator/device. Instead, Android Studio handles the packaging and installation of the app for you.
Set up port forwarding
You can use the forward command to set up arbitrary port forwarding, which forwards requests on a specific host port to a different port on a device. The following example sets up forwarding of host port 6100 to device port 7100:
Adb forward tcp:6100 tcp:7100
The following example sets up forwarding of host port 6100 to local:logd:
Adb forward tcp:6100 local:logd
Copy files to/from a device
Use the pull and push commands to copy files to and from an device. Unlike the install command, which only copies an APK file to a specific location, the pull and push commands let you copy arbitrary directories and files to any location in a device.
from the device, do the following:
Adb pull remote local
To copy a file or directory and its sub-directories to the device, do the following:
Adb push local remote
Replace local and remote with the paths to the target files/directory on your development machine (local) and on the device (remote). For example:
Adb push foo.txt /sdcard/foo.txt
Stop the adb server
In some cases, you might need to terminate the adb server process and then restart it to resolve the problem (e.g., if adb does not respond to a command).
To stop the adb server, use the adb kill-server command. You can then restart the server by issuing any other adb command.
Issuing adb commands
You can issue adb commands from a command line on your development machine or from a script. The usage is:
Adb [-d | -e | -s serial_number ] command
If there"s only one emulator running or only one device connected, the adb command is sent to that device by default. If multiple emulators are running and/or multiple devices are attached, you need to use the -d , -e , or -s option to specify the target device to which the command should be directed.
You can see a detailed list of all supported adb commands using the following command:
Adb --help
Issue shell commands
You can use the shell command to issue device commands through adb, or to start an interactive shell. To issue a single command use the shell command like this:
Adb [-d |-e | -s serial_number ] shell shell_command
To start an interactive shell on a device use the shell command like this:
Adb [-d | -e | -s serial_number ] shell
To exit an interactive shell, press Control + D or type exit .
Note: With Android Platform-Tools 23 and higher, adb handles arguments the same way that the ssh(1) command does. This change has fixed a lot of problems with command injection and makes it possible to now safely execute commands that contain shell metacharacters , such as adb install Let\"sGo.apk . But, this change means that the interpretation of any command that contains shell metacharacters has also changed. For example, the adb shell setprop foo "a b" command is now an error because the single quotes (") are swallowed by the local shell, and the device sees adb shell setprop foo a b . To make the command work, quote twice, once for the local shell and once for the remote shell, the same as you do with ssh(1) . For example, adb shell setprop foo ""a b"" .
Android provides most of the usual Unix command-line tools. For a list of available tools, use the following command:
Adb shell ls /system/bin
Help is available for most of the commands via the --help argument. Many of the shell commands are provided by toybox . General help applicable to all toybox commands is available via toybox --help .
- -D: Enable debugging.
- -W: Wait for launch to complete.
- --start-profiler file: Start profiler and send results to file .
- -P file: Like --start-profiler , but profiling stops when the app goes idle.
- -R count: Repeat the activity launch count times. Prior to each repeat, the top activity will be finished.
- -S: Force stop the target app before starting the activity.
- --opengl-trace: Enable tracing of OpenGL functions.
- --user user_id | current: Specify which user to run as; if not specified, then run as the current user.
- --user user_id | all | current: Specify user whose processes to kill; all users if not specified.
- [--user user_id | all | current] : Specify which user to send to; if not specified then send to all users.
- -r: Print raw results (otherwise decode report_key_streamresult). Use with [-e perf true] to generate raw output for performance measurements.
- -e name value: Set argument name to value . For test runners a common form is -e testrunner_flag value [, value ...] .
- -p file: Write profiling data to file .
- -w: Wait for instrumentation to finish before returning. Required for test runners.
- --no-window-animation: Turn off window animations while running.
- --user user_id | current: Specify which user instrumentation runs in; current user if not specified.
- --user [ user_id | current] : When supplying a process name, specify user of process to dump; uses current user if not specified.
- -n: Dump native heap instead of managed heap.
- -w: Wait for debugger when app starts.
- --persistent: Retain this value.
- --gdb: Start gdbserv on the given port at crash/ANR.
Example:
am display-size 1280x800
Example:
am display-density 480
Specification for intent arguments
For activity manager commands that take an intent argument, you can specify the intent with the following options:
A action Specify the intent action, such as android.intent.action.VIEW . You can declare this only once. -d data_uri Specify the intent data URI, such as content://contacts/people/1 . You can declare this only once. -t mime_type Specify the intent MIME type, such as image/png . You can declare this only once. -c category Specify an intent category, such as android.intent.category.APP_CONTACTS . -n component Specify the component name with package name prefix to create an explicit intent, such as com.example.app/.ExampleActivity . -f flags Add flags to the intent, as supported by setFlags() . --esn extra_key Add a null extra. This option is not supported for URI intents. -e | --es extra_key extra_string_value Add string data as a key-value pair. --ez extra_key extra_boolean_value Add boolean data as a key-value pair. --ei extra_key extra_int_value Add integer data as a key-value pair. --el extra_key extra_long_value Add long data as a key-value pair. --ef extra_key extra_float_value Add float data as a key-value pair. --eu extra_key extra_uri_value Add URI data as a key-value pair. --ecn extra_key extra_component_name_value Add a component name, which is converted and passed as a ComponentName object. --eia extra_key extra_int_value [, extra_int_value ...] Add an array of integers. --ela extra_key extra_long_value [, extra_long_value ...] Add an array of longs. --efa extra_key extra_float_value [, extra_float_value ...] Add an array of floats. --grant-read-uri-permission Include the flag FLAG_GRANT_READ_URI_PERMISSION . --grant-write-uri-permission Include the flag FLAG_GRANT_WRITE_URI_PERMISSION . --debug-log-resolution Include the flag FLAG_DEBUG_LOG_RESOLUTION . --exclude-stopped-packages Include the flag FLAG_EXCLUDE_STOPPED_PACKAGES . --include-stopped-packages Include the flag FLAG_INCLUDE_STOPPED_PACKAGES . --activity-brought-to-front Include the flag FLAG_ACTIVITY_BROUGHT_TO_FRONT . --activity-clear-top Include the flag FLAG_ACTIVITY_CLEAR_TOP . --activity-clear-when-task-reset Include the flag FLAG_ACTIVITY_CLEAR_WHEN_TASK_RESET . --activity-exclude-from-recents Include the flag FLAG_ACTIVITY_EXCLUDE_FROM_RECENTS . --activity-launched-from-history Include the flag FLAG_ACTIVITY_LAUNCHED_FROM_HISTORY . --activity-multiple-task Include the flag FLAG_ACTIVITY_MULTIPLE_TASK . --activity-no-animation Include the flag FLAG_ACTIVITY_NO_ANIMATION . --activity-no-history Include the flag FLAG_ACTIVITY_NO_HISTORY . --activity-no-user-action Include the flag FLAG_ACTIVITY_NO_USER_ACTION . --activity-previous-is-top Include the flag FLAG_ACTIVITY_PREVIOUS_IS_TOP . --activity-reorder-to-front Include the flag FLAG_ACTIVITY_REORDER_TO_FRONT . --activity-reset-task-if-needed Include the flag FLAG_ACTIVITY_RESET_TASK_IF_NEEDED . --activity-single-top Include the flag FLAG_ACTIVITY_SINGLE_TOP . --activity-clear-task Include the flag FLAG_ACTIVITY_CLEAR_TASK . --activity-task-on-home Include the flag FLAG_ACTIVITY_TASK_ON_HOME . --receiver-registered-only Include the flag FLAG_RECEIVER_REGISTERED_ONLY . --receiver-replace-pending Include the flag FLAG_RECEIVER_REPLACE_PENDING . --selector Requires the use of -d and -t options to set the intent data and type. URI component package You can directly specify a URI, package name, and component name when not qualified by one of the above options. When an argument is unqualified, the tool assumes the argument is a URI if it contains a ":" (colon); it assumes the argument is a component name if it contains a "/" (forward-slash); otherwise it assumes the argument is a package name.
Call package manager (pm)
Within an adb shell, you can issue commands with the package manager (pm) tool to perform actions and queries on app packages installed on the device. While in a shell, the syntax is:
Pm command
You can also issue a package manager command directly from adb without entering a remote shell. For example:
Adb shell pm uninstall com.example.MyApp
Table 3. Available package manager commands.
| Command | Description |
|---|---|
| list packages [ options ] filter | Prints all packages, optionally only
those whose package name contains the text in filter .
|
| list permission-groups | Prints all known permission groups. |
| list permissions [ options ] group | Prints all known permissions, optionally only
those in group .
|
| list instrumentation [ options ] | List all test packages.
|
| list features | Prints all features of the system. |
| list libraries | Prints all the libraries supported by the current device. |
| list users | Prints all users on the system. |
| path package | Print the path to the APK of the given package . |
| install [ options ] path | Installs a package (specified by path) to the system.
|
| uninstall [ options ] package | Removes a package from the system.
|
| clear package | Deletes all data associated with a package. |
| enable package_or_component | Enable the given package or component (written as "package/class"). |
| disable package_or_component | Disable the given package or component (written as "package/class"). |
| disable-user [ options ] package_or_component |
|
| grant package_name permission | Grant a permission to an app. On devices running Android 6.0 (API level 23) and higher, the permission can be any permission declared in the app manifest. On devices running Android 5.1 (API level 22) and lower, must be an optional permission defined by the app. |
| revoke package_name permission | Revoke a permission from an app. On devices running Android 6.0 (API level 23) and higher, the permission can be any permission declared in the app manifest. On devices running Android 5.1 (API level 22) and lower, must be an optional permission defined by the app. |
| set-install-location location | Changes the default install location. Location values:
Note: This is only intended for debugging; using this can cause apps to break and other undesireable behavior. |
| get-install-location | Returns the current install location. Return values:
|
| set-permission-enforced permission | Specifies whether the given permission should be enforced. |
| trim-caches desired_free_space | Trim cache files to reach the given free space. |
| create-user user_name | Create a new user with the given user_name , printing the new user identifier of the user. |
| remove-user user_id | Remove the user with the given user_id , deleting all data associated with that user |
| get-max-users | Prints the maximum number of users supported by the device. |
Call device policy manager (dpm)
To help you develop and test your device management (or other enterprise) apps, you can issue commands to the device policy manager (dpm) tool. Use the tool to control the active admin app or change a policy"s status data on the device. While in a shell, the syntax is:
Dpm command
You can also issue a device policy manager command directly from adb without entering a remote shell:
Adb shell dpm command
Table 4. Available device policy manager commands
| Command | Description |
|---|---|
| set-active-admin [ options ] component | Sets component as active admin. |
| set-profile-owner [ options ] component |
Sets component as active admin and its package as profile owner for an existing user.
|
| set-device-owner [ options ] component |
Sets component as active admin and its package as device owner.
|
| remove-active-admin [ options ] component |
Disables an active admin. The app must declare
android:testOnly
in the manifest. This command also removes device and profile owners.
|
| clear-freeze-period-record |
Clears the device"s record of previously-set freeze periods for system OTA updates. This is useful
to avoid the device"s scheduling restrictions when developing apps that manage freeze-periods. See
Manage system updates .
Supported on devices running Android 9.0 (API level 28) and higher. |
| force-network-logs | Forces the system to make any existing network logs ready for retrieval by a DPC. If there are connection or DNS logs available, the DPC receives the onNetworkLogsAvailable() callback. See Network activity logging . |
| force-security-logs |
Forces the system to make any existing security logs available to the DPC. If there are logs
available, the DPC receives the
onSecurityLogsAvailable()
callback. See Log enterprise device
activity .
This command is rate-limited. Supported on devices running Android 9.0 (API level 28) and higher. |
Take a screenshot
The screencap command is a shell utility for taking a screenshot of a device display. While in a shell, the syntax is:
Screencap filename
To use the screencap from the command line, type the following:
Adb shell screencap /sdcard/screen.png
Here"s an example screenshot session, using the adb shell to capture the screenshot and the pull command to download the file from the device:
$ adb shell shell@ $ screencap /sdcard/screen.png shell@ $ exit $ adb pull /sdcard/screen.png
Record a video
The screenrecord command is a shell utility for recording the display of devices running Android 4.4 (API level 19) and higher. The utility records screen activity to an MPEG-4 file. You can use this file to create promotional or training videos or for debugging and testing.
In a shell, use the following syntax:
Screenrecord [ options ] filename
To use screenrecord from the command line, type the following:
Adb shell screenrecord /sdcard/demo.mp4
Stop the screen recording by pressing Control + C (Command + C on Mac); otherwise, the recording stops automatically at three minutes or the time limit set by --time-limit .
To begin recording your device screen, run the screenrecord command to record the video. Then, run the pull command to download the video from the device to the host computer. Here"s an example recording session:
$ adb shell shell@ $ screenrecord --verbose /sdcard/demo.mp4 (press Control + C to stop) shell@ $ exit $ adb pull /sdcard/demo.mp4
The screenrecord utility can record at any supported resolution and bit rate you request, while retaining the aspect ratio of the device display. The utility records at the native display resolution and orientation by default, with a maximum length of three minutes.
Limitations of the screenrecord utility:
- Audio is not recorded with the video file.
- Video recording is not available for devices running Wear OS.
- Some devices might not be able to record at their native display resolution. If you encounter problems with screen recording, try using a lower screen resolution.
- Rotation of the screen during recording is not supported. If the screen does rotate during recording, some of the screen is cut off in the recording.
Table 5. screenrecord options
| Options | Description |
|---|---|
| --help | Displays command syntax and options |
| --size width x height | Sets the video size: 1280x720 . The default value is the device"s native display resolution (if supported), 1280x720 if not. For best results, use a size supported by your device"s Advanced Video Coding (AVC) encoder. |
| --bit-rate rate | Sets the video bit rate for the video, in megabits per second. The default value is 4Mbps. You can increase the bit rate to improve video quality, but doing so results in larger movie files. The following example sets the recording bit rate to 6Mbps: screenrecord --bit-rate 6000000 /sdcard/demo.mp4 |
| --time-limit time | Sets the maximum recording time, in seconds. The default and maximum value is 180 (3 minutes). |
| --rotate | Rotates the output 90 degrees. This feature is experimental. |
| --verbose | Displays log information on the command-line screen. If you do not set this option, the utility does not display any information while running. |
Read ART profiles for apps
Starting in Android 7.0 (API level 24) the Android Runtime (ART) collects execution profiles for installed apps, which are used to optimize app performance. You might want to examine the collected profiles to understand which methods are determined to be frequently executed and which classes are used during app startup.
To produce a text form of the profile information, use the command:
Adb shell cmd package dump-profiles package
To retrieve the file produced, use:
Adb pull /data/misc/profman/ package .txt
Reset test devices
If you test your app across multiple test devices, it may be useful to reset your device between tests, for example, to remove user data and reset the test environment. You can perform a factory reset of a test device running Android 10 (API level 29) or higher using the testharness adb shell command, as shown below.
Adb shell cmd testharness enable
When restoring the device using testharness , the device automatically backs up the RSA key that allows debugging through the current workstation in a persistent location. That is, after the device is reset, the workstation can continue to debug and issue adb commands to the device without manually registering a new key.
Additionally, to help make it easier and more secure to keep testing your app, using the testharness to restore a device also changes the following device settings:
- The device sets up certain system settings so that initial device setup wizards do not appear. That is, the device enters a state from which you can quickly install, debug, and test your app.
- Settings:
- Disables lock screen
- Disables emergency alerts
- Disables auto-sync for accounts
- Disables automatic system updates
- Other:
- Disables preinstalled security apps
If you app needs to detect and adapt to the default settings of the testharness command, you can use the ActivityManager.isRunningInUserTestHarness() .
sqlite
sqlite3 starts the sqlite command-line program for examining sqlite databases. It includes commands such as .dump to print the contents of a table, and .schema to print the SQL CREATE statement for an existing table. You can also execute SQLite commands from the command line, as shown below.
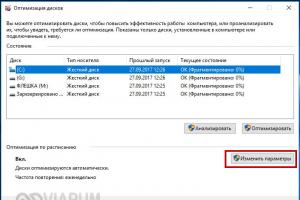
Если у вас есть телефон или планшет, работающий на базе ОС Android, то наверняка вы захотите подключить его к своему Windows 10 устройству, например, для передачи файлов. В этом случае, рекомендуем скачать ADB драйвера для Windows 10 – специальные библиотеки файлов, упрощающие работу двух устройств на разных ОС.
Особенности
Как правило, скачивать ADB драйвера для Windows 10 нет необходимости, если все, что вам нужно – передать файлы. Данные драйвера имеют куда более обширное назначение:- Осуществить передачу файлов с устройства на устройство;
- Получить ROOT права к ОС Android;
Если данная версия драйверов вам вдруг не подойдет, то не переживайте, всегда можно скачать – , это универсальна программа для автоматического поиска и установки любых драйверов, в том числе и АДБ.
Не смотря на то, что программа полностью бесплатная, она очень функциональная. Доступна версия на русском и на английском языке. Для тех, кто хочет одновременно загрузить еще и антивирусную программу, чтобы не заразить свой смартфон, рекомендуем использовать
Многие из нас уже знакомы с ADB (Android Debug Bridge), поскольку, будучи владельцем Android устройства, довольно часто приходится выполнять такие простые действия, как adb push и pull , или adb reboot и т.д. Но для многих начинающих пользователей один только вид командной строки уже пугает, и кажется запредельно возможным. Хотя на самом деле всё довольно просто, опытные пользователи не дадут мне соврать, а самая большая сложность заключается в том, чтобы запомнить все эти команды, хотя это тоже не обязательно делать, поскольку Интернет всегда под рукой и найти нужную команду не составляет труда.
Android Debug Bridge, который является частью эмулятора Android SDK, позволяет осуществлять связь между Вашим компьютером и подключенным к нему Android устройством, кстати если нужен какой то софт, то программы на ноутбук скачать бесплатно можно здесь. Что я могу делать с помощью ADB? Возможности у него довольно широкие, например, самые популярные действия: копировать файлы с Android устройства на компьютер, заливать файлы с компьютера на Android, выполнять множество Linux команд, получать отчеты об ошибках и т.д.
Поэтому, если Вы новичок в этом деле и хотите узнать немного больше об ADB, чем просто что это такое, тогда предлагаю Вам ознакомится с моим небольшим базовым пособием по изучению ADB.
Что понадобится
1. Android Debug Bridge (ADB) для Windows 32bit - скачать
2. Android Debug Bridge (ADB) для Windows 64bit - скачать
3. Компьютер с установленной Windows ОС.
Теперь переходим к активной фазе:
1. Скачиваем нужный zip архив и извлекаем его куда Вам будет угодно, например, диск С.
2. Теперь переходим в директорию C:/adb/sdk/platform-tools. Здесь вы найдете набор файлов, как показано на картинке ниже.
3. Зажимаем кнопку Shift + правый клик мышью и запускаем командную строку Windows с текущей директории.
4. Вводим команду adb start-server .
5. Чтобы убедится, что Ваше устройство правильно подключено и было распознано компьютером, введите команду: adb devices . Если всё хорошо, вы увидите что то похоже на это:

Теперь, когда Ваше устройство подключено и всё работает, давайте немного с ним поиграем.
Читаем LOGCAT через ADB
Самый простой способ, это выполнить команду: adb logcat . Как результат, на экране появится всё содержимое лог файла устройства. Чтобы получить logcat в отдельном файле выполните: adb logcat > logcat.txt .
Отчет об ошибках (BUGREPORT)
Можно выполнить команду: adb bugreport , но вы получите уведомление, что сформировавшийся отчет невозможно будет прочитать, поэтому лучше воспользоваться: adb bugreport >result.txt .

ADB совместно с ROOT правами доступа
Для работы из-под ADB с полными правами доступа, нужно рутить девайс. Если девайс уже рученый, тогда выполняем команду: adb root и видим то, что показано на картинке ниже (перезагрузка ADB с root правами).

Установка приложений через ADB
Чтобы установить приложение, убедитесь, чтобы в названии apk файла не было пробелов и надо точно знать правильный путь к нему. Ну а дальше выполняем команду: adb install + название файла инсталяции. В своем примере я установил игру papertoss, поэтому если всё пройдет успешно, вы получите на экране такую картинку:

Если у вас есть смартфон с операционной системой Android и вы часто с ним экспериментируете, что-то настраиваете или перепрошиваете, то, скорее всего, вы уже знакомы с инструментом ADB или (Android Debug Bridge). Это программа для управления смартфоном через компьютер по USB, которая содержит множество полезных команд.
Вы можете просматривать журналы, устанавливать и удалять приложения, управлять устройством и выполнять множество других полезных команд. Из этой статьи вы узнаете как пользоваться ADB в Linux, мы рассмотрим полезные команды ADB для пользователей Android и подробно разберем эту утилиту. Но сначала рассмотрим как установить сам инструмент на компьютер.
Программа ADB входит в стандартный набор утилит Android SDK. Вы можете установить эту среду и получите нужную утилиту. Но не всегда хочется тянуть на компьютер целую среду исполнения. Иногда нужна только одна программа. Ее можно очень просто установить отдельно. В Ubuntu для этого можно выполнить команду:
sudo apt install android-tools-adb
Для Red Hat, CentOS команда будет немного отличаться:
sudo yum install android-tools-adb
Если вам нужно установить ADB в Windows, то придется скачать пакет SDK Platform Tools из официального сайта.
Подготовка смартфона
Для того чтобы вы смогли использовать adb вместе со своим смартфоном вам необходимо включить режим отладки по USB. Эта возможность скрыта во всех версиях Android начиная с 4.2. Чтобы стать разработчиком сначала зайдите в "Настройки" -> "О телефоне" и семь раз нажмите на пункте "Номер сборки" :

Затем в главном меню настроек появится пункт "Для разработчиков" :

Тут необходимо поставить галочку напротив раздела "Разрешить отладку по USB" :


Теперь ваш телефон готов к работе с adb. Подключите его по USB к вашему компьютеру и начнем работать.
Полезные команды ADB
Перед тем как мы сможем управлять устройством, необходимо еще кое-что сделать. Команде adb требуется специальная служба для связи с Android необходимо ее запустить. Для этого используйте такую команду:
adb start-server

После завершения работы вы можете отключить службу чтобы она не потребляла лишние ресурсы:
Теперь можно выполнять adb команды для android.
Список устройств
Первым делом, посмотрим список подключенных устройств к нашему компьютеру. Для этого используется команда devices:

Если к системе подключено несколько смартфонов, то по умолчанию действия будут применяться к первому. Но вы можете задать нужное имя устройства с помощью опции -s. Например:
adb -s 0123456789ABCDEF logcat
Также указать имя устройства, к которому необходимо применять команды программы adb можно с помощью переменной ANDROID_SERIAL:
export ANDROID_SERIAL=0123456789ABCDEF
Тогда все команды adb будут применяться к устройству, указанному в этой переменной.
Состояние устройства
С помощью команды get-state вы можете узнать состояние устройства:

Команда вернет одно из значений: device - работает, bootloader - загружается, offline - выключено. С помощью команды status-window можно постоянно отслеживать состояние:
adb status-window

Просмотр журналов
Самое частое действие, которое приходится делать разработчикам и тестировщикам мобильных приложений в поиске ошибок - это просмотр журналов системы и приложений. Для этого применяется команда logcat:

Утилита выводит содержимое логов Android в реальном времени, так что вы сразу увидите все сообщения об ошибках. Также можно записать все в файл:
adb logcat -d > ~/android.log
С помощью опции -c можно очистить все логи на устройстве:
Не всегда нужно смотреть полный системный лог, иногда будет достаточно только увидеть сообщения нужной программы.. Для этого просто укажите имя пакета:
adb logcat com android.settings
С помощью опции --log-level можно установить уровень подробности сообщений, доступны такие варианты: V, D, I, W, E, F, S. Для выбора подробности вывода укажите нужную букву через двоеточие после имени приложения:
adb logcat com android.settings:E
Или выведем только ошибки для всей системы целиком:

Передача файлов на устройство
Если вам нужно быстро отправить файл на устройство, для этого можно использовать команду push. Вот ее синтаксис:
$ adb push /адрес/локального/файла /адрес/удаленного/файла
Например, загрузим файл из домашней папки на устройство:
adb push ~/file /sdcard/file

Файл будет мгновенно передан на устройство и вы можете в этом убедиться. Дополнительно можно использовать опцию -p для отображения прогресса, а также опцию -a чтобы сохранить оригинальный timestamp.
Таким же образом вы можете скачать файл с устройства. Синтаксис команды pull:
$ adb push /адрес/удаленного/файла /адрес/локального/файла
Например, скопируем отправленный файл обратно:
adb pull /sdcard/file ~/file1

Установка приложений
С помощью adb можно напрямую устанавливать приложения. Эта возможность может быть очень удобной для разработчиков. Команде install нужно передать только адрес apk файла:
adb install ~/Momentum_apkpure.com.apk

После этого приложение установлено и готово к работе на вашем устройстве. Если вам нужно обновить приложение до более новой версии, тогда используйте опцию -r. Это очень важно. Иначе получите ошибку:
adb -r install~/Momentum_apkpure.com.apk
Еще доступны опции -s - для установки на флешку и -d - для понижения версии программы.
Удаление приложений
Удалить приложение тоже очень просто. Для этого достаточно передать имя его пакета команде uninstall. Например, удалим браузер Firefox:
adb uninstall org.mozilla.firefox
Резервное копирование
Вы можете создать резервную копию своей прошивки и всех системных файлов Android для того, чтобы ее потом очень просто и быстро восстановить. Для этого используется команда backup. Сначала рассмотрим ее синтаксис:
$ adb backup опции пакеты
Опции указывают какие данные нужно копировать. Каждая опция может иметь приставку no, которая означает, что эти данные копировать не нужно. Рассмотрим основные опции:
- -apk - сохранять apk файлы для программ, по умолчанию отключено;
- -obb - сохранять расширения установленные расширения apk файлов в формате obb. По умолчанию отключено;
- -shared - сохранять данные приложений из SD карты или памяти телефона, отключено;
- -all - сохранить все установленные приложения;
- -system - сохранить системные приложения, эти приложения уже входят в список all.
Последний параметр позволяет указать какие приложения нужно сохранять. Если указана опция all, то, естественно, что этот параметр не нужен. Таким образом, команда для резервного копирования системы будет выглядеть вот так:
adb backup -apk -obb -shared -all -f backup.ab
 С помощью опции -f мы задаем имя файла архива, он будет сохранен в текущей папке. Если его не задать, то имя по умолчанию будет backup.ab. Вам нужно будет подтвердить создание копии на телефоне, можно ввести пароль для шифрования:

Для восстановления из резервной копии используйте команду restore. Ей достаточно передать адрес файла:
adb restore android.ab
В утилиты adb есть даже команды для перезагрузки устройства. Можно просто перезагрузить смартфон с помощью команды reboot:
Можно загрузиться в режим recovery:
adb reboot recovery
Или в режим настройки загрузчика:
adb reboot bootloader
Консоль Android
С помощью команды shell вы можете войти в консоль Android и выполнять там необходимые действия. Здесь доступно большинство привычных нам команд linux. Мы подробно рассматривали все доступные команды в статье . Сейчас же поговорим про саму команду shell и приведем несколько примеров. Чтобы войти в консоль наберите:

adb shell ls /system

Например, с помощью такой команды вы можете сделать снимок экрана:
adb shell screencap -p /sdcard/screenshot.png
А так можно снять экран смартфона на видео:
adb shell screenrecord /sdcard/video.mp4
Выводы
В этой статье мы рассмотрели как пользоваться утилитой adb для управления Android смартфоном, а также основные команды программы adb, которые вы можете применять. Команды adb shell - это те же команды, что вы можете выполнять в терминале Android, поэтому нет смысла их разбирать еще раз. Надеюсь, информация из этой статьи была вам полезной.
Об авторе
Основатель и администратор сайта сайт, увлекаюсь открытым программным обеспечением и операционной системой Linux. В качестве основной ОС сейчас использую Ubuntu. Кроме Linux интересуюсь всем, что связано с информационными технологиями и современной наукой.